I'm a married man! A few Saturdays ago (the 16th March to be precise), I married the love of my life Laura. The wedding went off without a hitch, Laura looks amazing, the rain staying away and a great night was had by all. Strange how after all the months of planning, the night itself flashed by so quickly - I didn't even get around to see all the guests, and we only had 70! I'll post some photos up once we get them back from the photographer - who also happens to be my very talented
sister, Liss!
Laur and I then headed off to Bali for a week long honeymoon. We stayed out of the busy Kuta area, in a villa with a private walled garden and plunge pool. It's an amazing place once you get out of the tourist trap, and we both had a really relaxing time. Even managed to get a bit of a tan!
So, now I know I said last post that I'd be posting more BTH2 planes, and they are photographed and just waiting for me to post them up. However, in the intervening weeks i've had the opportunity to get involved in the play-testing of the up and coming
Too Fat Lardies ruleset, Chain of Command.
Chain of Command is a platoon 'plus' level rule-set for WWII. As always with the Lardies, the rules include some great innovations, and focus on the role of leaders on the battlefield.
Rich Clarke has placed some excellent taster videos over on the
lard island blog, which explain the main rule mechanics and include a play-through. I do urge you to check them out, along with Neil Shuck's recent
Meeples and Miniatures podcast on the rules.
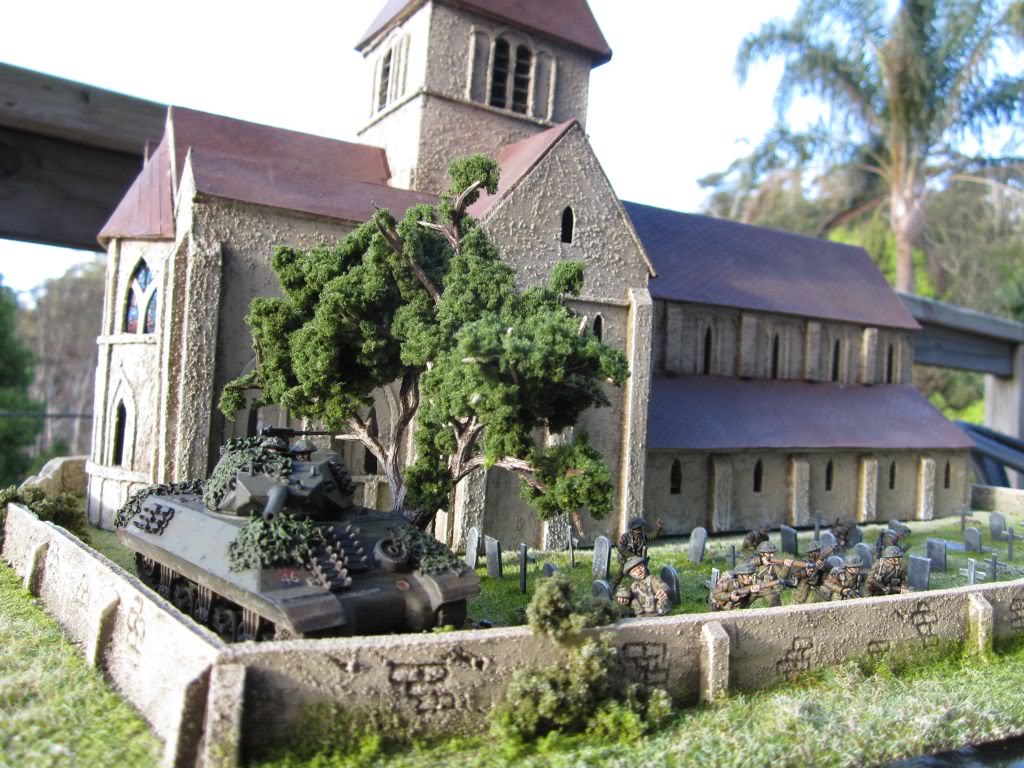
 |
| The bridge and Nez Corchu |
So, while I'm carrying on with the playtesting, i'll be posting up some After Action Reports, as well as some pics of units as I add to my WWII 20mm collection. For the playlist below, my British infantry platoon from the 6th King's Own Scots Borderers, with a Churchill Mk III in support, faced off against a platoon of German grenadiers from 21st Panzer Division, aided by a tripod mounted MG42. The Germans had to a bridge over a small river, snear the (fictional) village of Nez Corchu in the Normandy bocage country. For the commanders, I've used the characters I developed with platoon forward.
Without further ado...
Seize the Bridge at Nez Corchu, mid June 1944.
Patrol Phase
 |
| British entry point |
Chain of Command begins with a patrol phase. In this phase, markers representing pre-battle reconnaissance patrols advance from entry points until they are within 12" of an enemy marker, when they are locked down.
The British patrol markers entered from a single point down the main road to the bridge. Being the attackers, they got a number of free moves. Then the Germans began to move out. Eventually the markers were all locked down in the vicinity of the small village straddling the road to the bridge. The patrol markers were removed, and three jump-off points placed for each side. The Jump off markers are placed in cover back from the patrol markers. Think of it as the patrol markers representing the furthest point of advance, and the jump-offs as 'safe' points on the battlefield from which the force commander can feed uncommitted sections or fire-teams into the battle.
 |
| German and British patrols lock down |
 |
| Jump-off points placed, and ready for action |
Turn 1
So, with deployment sorted, the game proper began. Chain of Command plays as a series of phases, each making up a turn. Each phase represents 10sec or so of action. At the beginning of each phase, the active player rolls a number of command dice which allow them to activate sections, fire-teams, leaders or support teams. Turns are more considerable periods of time, and represent the ebb and flow of battle. Additionally, any 5s rolled accumulate on the 'Chain of Command' dice (more on that later), and 6s can affect the turn sequence, granting the player multiple active phases.
 |
| Cpl Robson's section set off towards Nez Corchu |
 |
| British attack develops |
 |
| Achilles II moves up. Slowly. |
The British started the ball rolling, deploying a rifle section under Corporal James Robson. Robson's section soon headed up the bocage lined road towards the hamlet. A lucky roll on the command dice meant the Brits could take the initiative early, and so on to the table came a second section under Corporal Angus Duncan, along with the Churchill III, the mighty
Achilles II under command of Sgt. Norman Dudley.
The British plan was to send Robson's section down the main road into the village, clearing the way for the churchill. Duncan's section would advance through the bocage on the right, hopefully outflanking any defence of the village. Finally, Corporal Bill MacLaggan's section would go wide on the left, trying to bypass the village entirely and reach the bridge, cutting off the German
retreat.
 |
| Movement in the Boulangerie |
The Germans chose to remain hidden, hoping to ambush the advancing sections at close quarters. Robson's section moved more cautiously as they approached the village of Nez Corchu. this was a good move, as the Germans deployed a rifle gruppe under Gefreiter Enno Holzmann to their jump off point in the village bakery and opened up with their MG42 team, killing two men and causing shock to the unit. Had Robson's men not taken cover by adopting a 'tactical' stance, they may have fared much worse. As the Bren team fruitlessly attempted to silence the MG42, the British deployed their 2" mortar team and sent it scurrying down the road. When the bakery came into view, the team set up and fired a smoke shell, hitting the target and blocking Holzmann's line of sight.
 |
| Robson's section takes cover, as the 2" mortar moves up |
Literally the next German command dice was three 6s, which ended the turn immediately clearing the smoke just laid.
 |
| End of Turn 1. The British attack develops, and meets resistance. |
Turn 2
 |
| Robson heads for the house |
The beginning of turn two saw Robson's section loosing men and gaining shock from the Germans in the Bakery. Holzmann's gruppe was exacting a heavy toll, and the German defence was firming up. the Platoon Feldwebel, Rudi Böhler, deployed along with a tripod mounted MG42 and a second rifle gruppe under Gefreiter Heinrich Baer. Fortuitously for the Brits, the 2" was activated again and again was smack on target with the smoke. Nonetheless, Robson's Bren team remained hunkered down on 'tactical', while Robson led the rifle team in a mad dash to towards the house across from the bakery from where they could better engage the enemy.
 |
| Churchill moves up. |
The Churchill was taking its sweet time trundling up the road, as was Cpl Duncan's flanking section. Even the deployment of Platoon Sgt Arthur Campbell had not been able to counter some very poor movement dice rolls. McLaggan's section, on the other hand, had swiftly moved through the bocage and was poised to break through the last hedgerow and come around the German flank.
Just as McLaggan and his section emerged from the hedgerow, the Germans deployed their last uncommited rifle gruppe, under Gefreiter Willi Reiniger. Reiniger's gruppe opened up immediately, killing one man and lightly wounding McLaggan, but only inflicting one shock.
 |
| McLaggen's section emerges... |
 |
| ...Into the waiting muzzles of Reiniger's gruppe |
 |
| Duncan's men attack with grenades |
Meanwhile, on the right, Baer's gruppe moved up to the hedgeline and went tactical, just as Duncan's section reached the other side. I was unsure of how to treat this encounter (Rich has since clarified that these troops should count as in close combat - which makes sense). In any case, both Duncan's and Baer's sections avoided firing through the hedgerow and resorted to throwing grenades. This saw Baer's troops coming off much worse, taking several casualties and a few points of shock.
 |
| McLaggan's men turn the tables on their ambushers |
Back on the left, the Germans activated Reiniger's gruppe to fire again at McLaggan's troops, when the British interrupted the turn using their Chain of Command dice. Instead, McLaggan ordered his men to open up on the Germans, and some lucky dice rolling saw the Reiniger's men suffering 4 casualties (including Reiniger who was badly wounded) and 5 shock, which sent the remnants of the section reeling back towards the bridge. With all German assets engaged, the platoon commander, Leutnant Andreas Dörpfeld deployed at the bridge and rallied the fleeing men, just as the turn ended again.
Turn 3
 |
| Holzmann's MG42 team switches targets |
As soon as the smoke in front of the bakery cleared, the 2" mortar again fired dead on target. Robson lead his riflemen into the building across the road and engaged the enemy killing several of Holzmann's men. However, the remainder of Holzmann's men finally had a target. With one deadly burst from the MG42 team, Robson's rifle-team was decimated, leaving the Corporal with only one rifleman remaining.
On the right, Duncan abandoned the grenade-throwing and led his rifle team through a gap in the hedgerow and into hand to hand with the remnants of Baer's men. In the brutal hand to hand, both sides took casualties and shock, but when the dust cleared it was the outnumbered Germans who held the hedgerow. Duncan and the survivors fled back through the gap, past the uncommitted Bren team and ran straight into Sgt Campbell, who berated Duncan and led the men back back towards the hedgerow.
 |
| Hand-to-hand in the hedgerows |
 |
| Baer's men hold the line |
 |
| McLaggan's Bren team heads for the bridge |
On the Right, McLaggan's route to the bridge was clear. He ordered his beefed up Bren team to move quickly towards the bridge and engage Reiniger's tattered gruppe, while he personally led two men to secure the nearby German jump-off point.
 |
| Achtung, Panzer! |
Despite the British taking heavy casualties around the bakery and in the hedgerow fight, the game was almost up for the Germans. Their force morale had taken a hammering, and now the mighty
Achilles II finally clanked its way into the battle. As the turret rotated to engage the tripod MG42, the Germans scurried back into cover. Baer ordered two of his men to take a panzerfaust and to stalk the iron beast, while he led the remainder of his section back to the new defensive line. The Panzerfaust hit but failed to penetrate, and the coaxial besa MG made short work of the two landser.
 |
| Better late than never. |
McLaggan's men engaged Reinegger's small group, while the Cpl and his small team made for the bridge.
 |
| Last defenders |
As the Churchill lumbered up the main road, Holzmann's gruppe fired their panzerfaust down onto the passing tank narrowly missing. Another burst of coax severley wounded the Gefreiter, finally breaking the German force morale and, with their escape route blocked, the tattered remnants surrendered. The bridge was secured, but two of the British sections had suffered heavy casualties.
SUMMARY
 |
| Achilles II heads for the bridge |
So, that was my first game of Chain of Command. Thanks for sticking with me this far, I know it's turned into a bit of an essay, but I hope it was a fraction as enjoyable to read as it was to play. I realise now that I didn't allocate enough dice for the Panzerfaust, and if used correctly there's a much higher chance that Achilles II would have become a flaming wreck, possibly tipping the scales in favour of the Germans. The game took about 2-3 hours, although it felt very fast indeed. Its a very immersive and engaging game, and playing it feels like you are watching an episode of Band of Brothers. The command dice system really does make you think about how you will allocate your limited resources, and the Chain of Command dice are extremely useful. If it wasn't for the ability to Interrupt Reiniger's attack, it would seem unlikely that McLaggan's path to the bridge would have been so easy.
I can't wait to have another crack at the rules, and as soon as i've finished the batch of commission stuff on my table, I'll be adding to my German forces, and then starting on some British paratroopers.